概述
上节我们介绍了搭建自己的 name-space, 接下来我们准备在我们的 namespace 上部署我们的应用,首先我们要创建自己的应用。
编写我们的k8s demo 应用
请参考: https://github.com/IceFrozen/springboot-k8s-demo
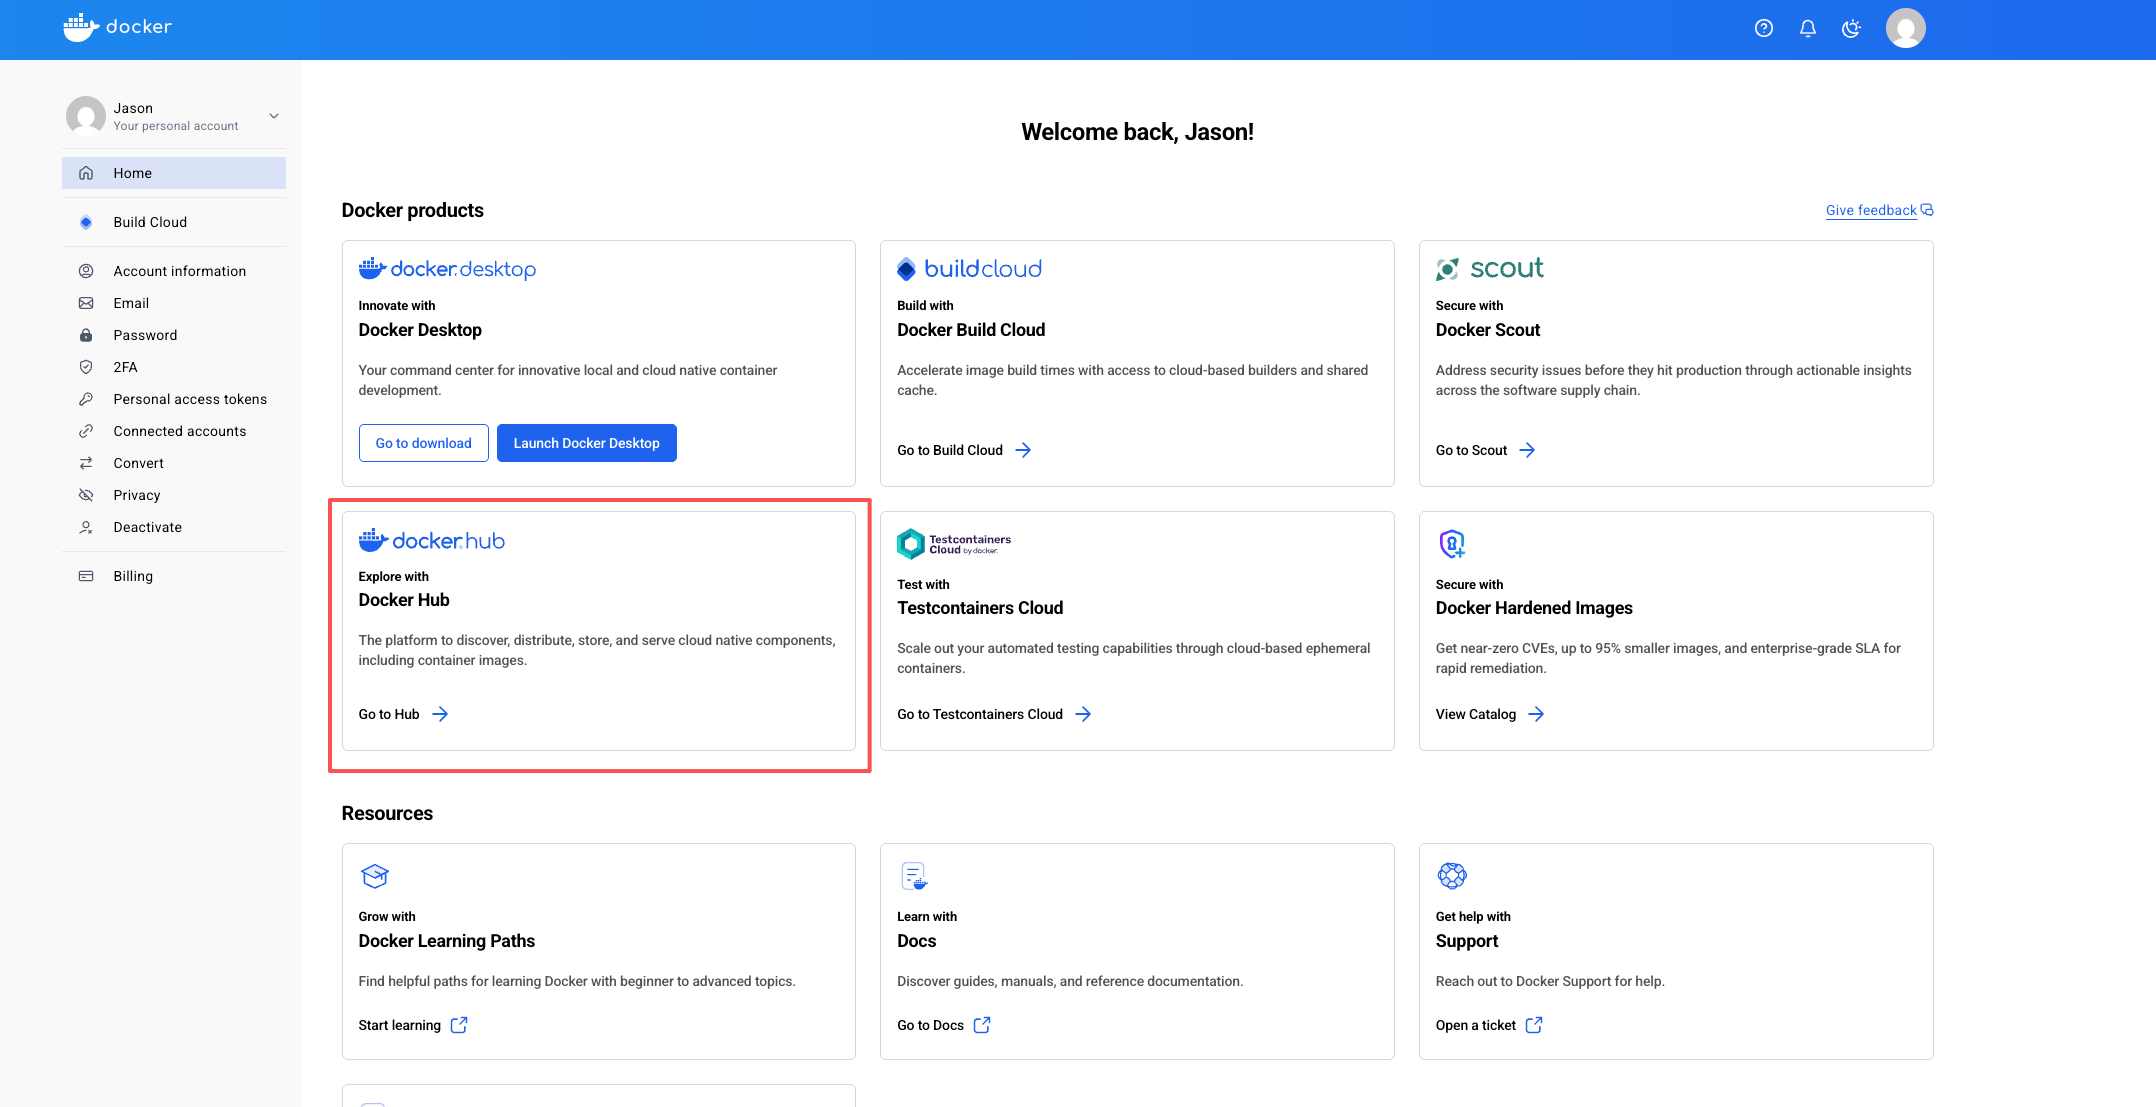
登录我们的 Docker Hub 先创建我们的账号
登录
选择仓库
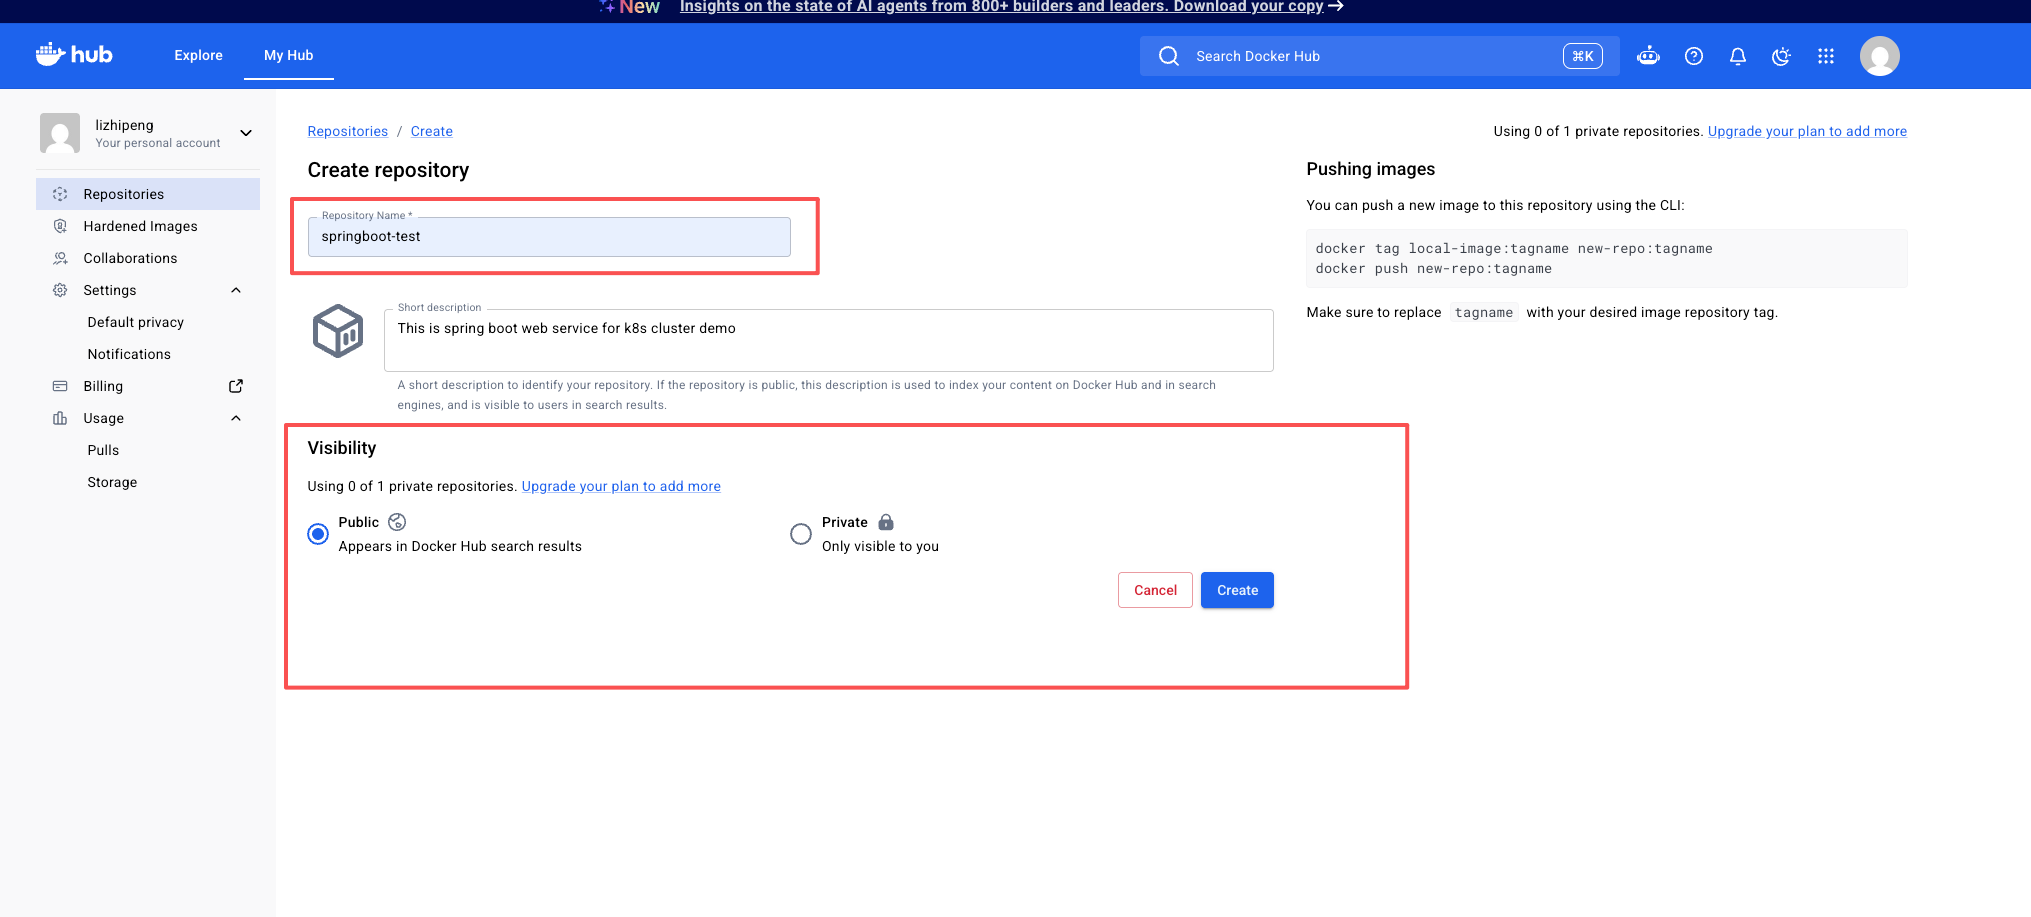
创建仓库名字 springboot-test
部署我们的应用
想要部署我们的应用,我们首先需要一个拥有 docker 的环境,在上两两篇文章中,我们搭建了一个集群,这里我们使用另外一台新的机器,我们命名为k8srepo, ip 设置为 192.168.3.110 , 同样的我们也使用红帽 9 系统作为,由于我们已经安装了 podman, 这里我们需要让 podman 变成 docker 命令来兼容 docker的命令以便可以 运行springboot-k8s-demo
我在一个新的 node 中,注意一下 node 并不是k8s集群的节点,这样以来我们避免了一些软件和环境的冲突
1 2 3 4 5 6 7 8 9 10 11 12 13 14 15 16 17 18 19 20 21 22 23 24 25 26 dnf install -y podman podman-plugins dnf install -y podman podman-plugins dnf install -y python3-pip dnf install -y java17 dnf config-manager --add-repo https://download.docker.com/linux/centos/docker-ce.repo ln -s /usr/bin/podman /usr/local/bin/dockerln -s /usr/local/bin/podman-compose /usr/local/bin/docker-composegit clone https://github.com/IceFrozen/springboot-k8s-demo.git cd springboot-k8s-demovim springboot-k8s-demo/WebService/deploy.sh docker login ./Build.sh dev HTTPS_PROXY=http://192.168.3.240:7897 HTTP_PROXY=http://192.168.3.240:7897 docker push --format docker <your docker hub username>/springboot-test:latest
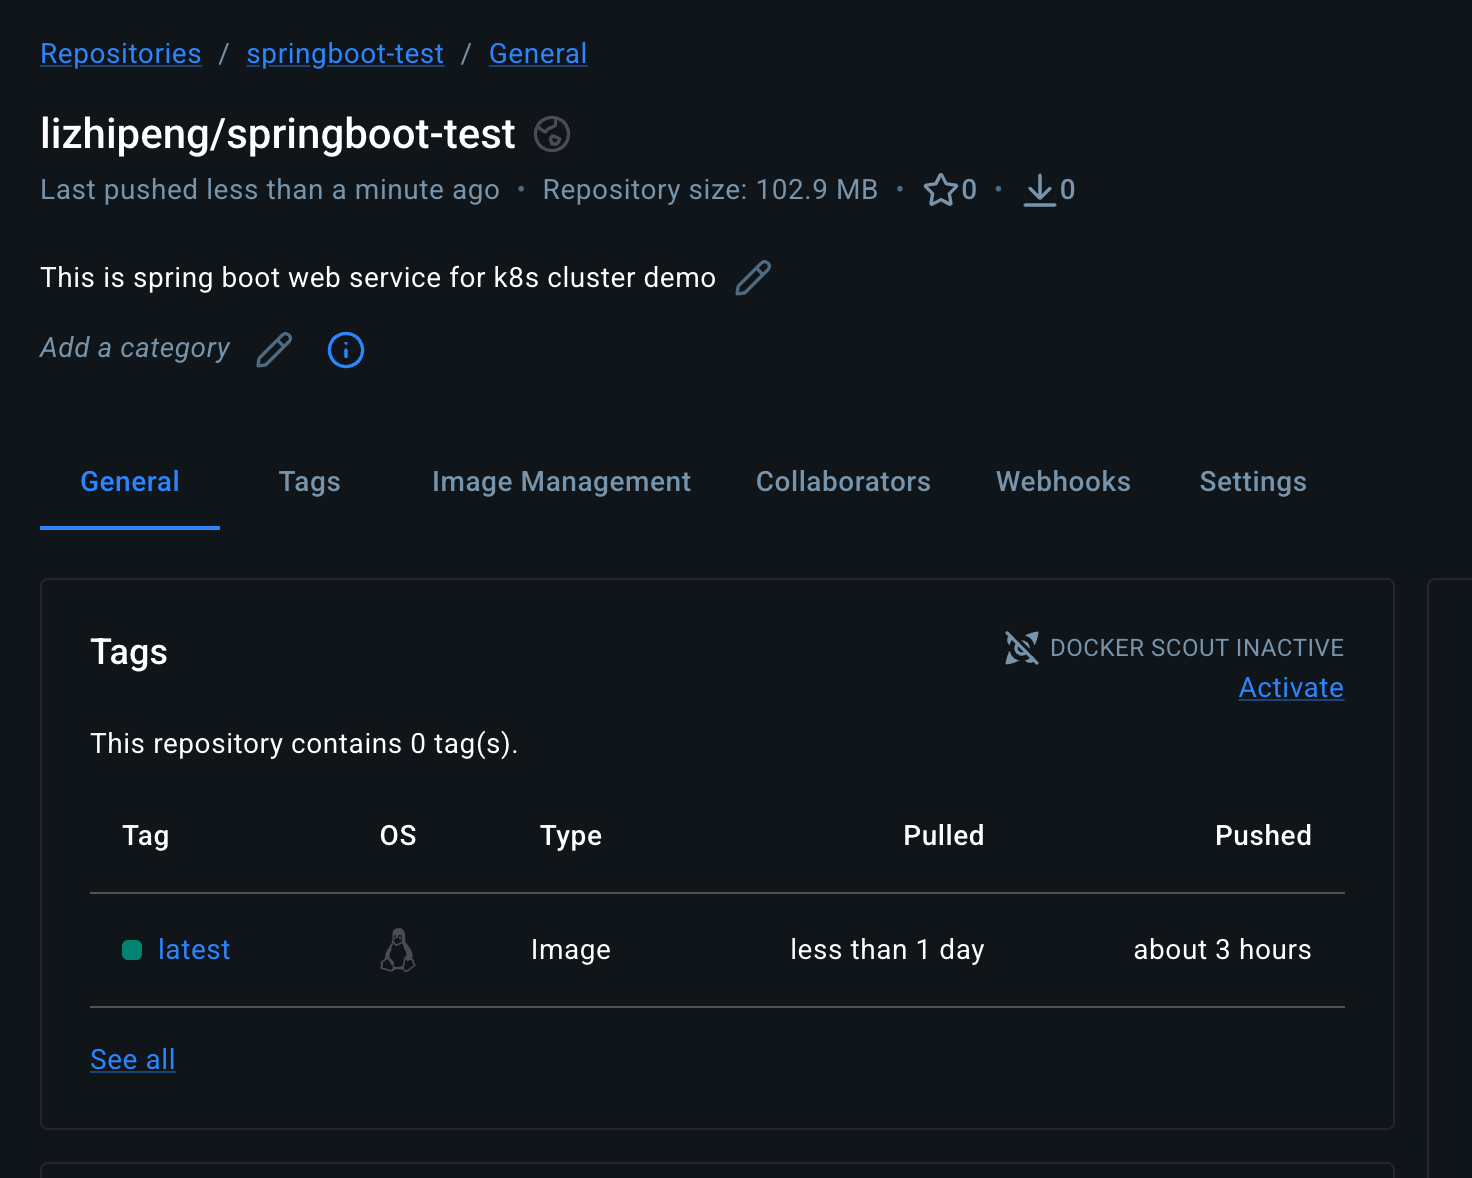
之后可以发现,我们的镜像已经 push 成功
接下来我们可以用这个镜像来测试我们的应用,这里这个应用有三个 API
1
2
3
4
5
6
7
8
9
10
11
12
13
14
15
16
17
18
19
20
21
22
23
24
GET /info Body: { "hostName" :"springboot-test-8d957c564-7mmrn" , "osVersion" :"5.14.0-611.5.1.el9_7.aarch64" , "canonicalHostName" :"springboot-test-8d957c564-7mmrn" , "javaVersion" :"17.0.19" , "osName" :"Linux" } --- GET /hello Body: hello world --- GET /memory Body: { "usedMemoryMB" :102, "totalMemoryMB" :512, "maxMemoryMB" :1024, "freeMemoryMB" :409 }
部署一个应用到k8s集群
我们在 k8snode 节点(注意,这个节点是我们创建自己的空间的时候所用的节点,是一个 k8s worker 节点,并且我们已经配置的 kubectl name spaces 是我们自己的 space)
1 2 3 4 5 6 7 8 9 10 11 12 13 14 15 16 17 18 19 20 21 22 23 24 25 26 27 28 29 30 31 32 33 34 35 36 apiVersion: apps/v1 kind: Deployment metadata: name: springboot-test spec: replicas: 1 selector: matchLabels: app: springboot-test template: metadata: labels: app: springboot-test spec: nodeSelector: node-role.kubernetes.io/worker: "" containers: - name: springboot-app image: lizhipeng/springboot-test ports: - containerPort: 8081 --- apiVersion: v1 kind: Service metadata: name: springboot-test-service namespace: zhipeng-space spec: type : NodePort selector: app: springboot-test ports: - port: 80 targetPort: 8081 nodePort: 30088
创建我们的应用
1
2
3
4
5
6
7
8
9
10
[root@k8snode4 yaml]# kubectl apply -f springboot-test-nodePort.yaml deployment.apps/springboot-test created service/springboot-test-service created [root@k8snode4 containerd.service.d]# kubectl get pods -o wide NAME READY STATUS RESTARTS AGE IP NODE NOMINATED NODE READINESS GATES springboot-test-8d957c564-7mmrn 1/1 Running 0 2m10s 10.244.192.68 k8snode4 <none> <none> [root@k8snode4 containerd.service.d]# kubectl get service -o wide NAME TYPE CLUSTER-IP EXTERNAL-IP PORT(S) AGE SELECTOR springboot-test-service NodePort 10.96.18.208 <none> 80:30088/TCP 2m24s app=springboot-test
排查问题
当然,如果我们发现除了错,可以使用 kubectl describe 来排查错误 例如:
1
2
3
4
5
6
7
8
9
10
11
12
kubectl describe pod springboot-test-service—<id > -n zhipeng-space vents: Type Reason Age From Message ---- ------ ---- ---- ------- Normal Scheduled 63s default-scheduler Successfully assigned zhipeng-space/springboot-app-8569fc86f6-7d7wr to k8snode5 Normal Pulling 62s kubelet spec.containers{springboot}: Pulling image "m9961014/springboot-k8s-demo:latest" Warning Failed 2s kubelet spec.containers{springboot}: Failed to pull image "m9961014/springboot-k8s-demo:latest" : failed to pull and unpack image "docker.io/m9961014/springboot-k8s-demo:latest" : failed to resolve image: unexpected status from HEAD request to https://docker.m.daocloud.io/v2/m9961014/springboot-k8s-demo/manifests/latest?ns=docker.io: 403 Forbidden Warning Failed 2s kubelet spec.containers{springboot}: Error: ErrImagePull Normal BackOff 1s kubelet spec.containers{springboot}: Back-off pulling image "m9961014/springboot-k8s-demo:latest" Warning Failed 1s kubelet spec.containers{springboot}: Error: ImagePullBackOff [root@k8snode4 yaml]#
测试服务
测试
说明
curl 10.244.192.68:80Pod 本身是否正常
curl 10.96.18.208:80Kubernetes Service 是否正常
curl 192.168.3.124:30088NodePort 是否正常
浏览器访问 192.168.3.124:30088
集群外部访问是否正常
1
2
3
4
[root@k8snode4 yaml]# curl http://10.96.18.208:80/hello hello world[root@k8snode4 yaml]# curl http://10.96.18.208:80/info {"hostName":"springboot-test-8d957c564-7mmrn","osVersion":"5.14.0-611.5.1.el9_7.aarch64","canonicalHostName":"springboot-test-8d957c564-7mmrn","javaVersion":"17.0.19","osName":"Linux"}[root@k8snode4 yaml]# curl http://k8snode4:30088/info {"hostName":"springboot-test-8d957c564-7mmrn","osVersion":"5.14.0-611.5.1.el9_7.aarch64","canonicalHostName":"springboot-test-8d957c564-7mmrn","javaVersion":"17.0.19","osName":"Linux"}[root@k8snode4 yaml]#
使用 CordDNS 来访问我们的服务
使用默认域名访问我们的服务
当然我们也可以使用 K8s 内部的域名方式来访问我们的服务,针对于内部域名只是在我们 pod 内部使用的,原因在于我们安装了 coredns ,因此我们可以在我们的 pod 内部使用域名来访问我们的服务。
kubectl exec -it – cat /etc/resolv.conf
1
2
3
search zhipeng-space.svc.cluster.local svc.cluster.local cluster.local nameserver 10.96.0.2 options ndots:5
所以 Pod 里直接用 Service 名即可(kubelet 的 clusterDNS: 10.96.0.2 已生效):
1
2
3
4
5
6
7
8
springboot-test-service springboot-test-service.zhipeng.svc.cluster.local 命名规则: <service>.<namespace>.svc.<clusterDomain> │ │ └── cluster.local(kubeadm init 的 dnsDomain) │ └── 你的 ns:zhipeng(你笔记里的 zhipeng-space) └── Service 名,不是 Deployment 名!
1 2 kubectl exec -it springboot-test-8d957c564-7mmrn -n zhipeng-space -- /bin/bash
1 2 3 4 curl http://springboot-test-service:80/info wget http://springboot-test-service:80/info
测试如下:
1
2
3
4
5
6
7
8
9
10
11
kubectl exec -it springboot-test-8d957c564-7mmrn -n zhipeng-space -- /bin/bash springboot-test-8d957c564-7mmrn:/app# ls 192e158 app-0.0.1.jar deploy.sh logs Dockerfile conf lib start-service.sh springboot-test-8d957c564-7mmrn:/app# wget http://springboot-test-service/info Connecting to springboot-test-service (10.96.18.208:80) saving to 'info' info 100% |*************************************************************************************| 186 0:00:00 ETA 'info' savedspringboot-test-8d957c564-7mmrn:/app# cat info {"hostName" :"springboot-test-8d957c564-7mmrn" ,"osVersion" :"5.14.0-611.5.1.el9_7.aarch64" ,"canonicalHostName" :"springboot-test-8d957c564-7mmrn" ,"javaVersion" :"17.0.19" ,"osName" :"Linux" }springboot-test-8d957c564-7mmrn:/app#
但是要注意的是,如果用 https 是无法访问通的,因为我们并没有暴漏 https 的端口,因此我们需要修改我们的 yaml 文件,添加 https 的端口,然后重新部署我们的应用。如何利用证书实现 https 的功能我们会放到下节解释。
在集群节点或者内部 POD上访问我们的服务(修改 resolv.conf的方式)
在pod 内部访问服务,同时我们也可在集群的节点上来通过域名访问服务。因为我们的节点的 /etc/resolv.conf 默认指向 192.168.3.1(网关 DNS),解析不了 cluster.local。只需要把 CoreDNS 加为第一 DNS 即可(ClusterIP 在节点上可达,因为 kube-proxy 在每个节点都写了转发规则):这里有个需要注意的一点就是,当我们使用两个 dns的时候,注意节点的 options 参数,options ndots:5 timeout:1 attempts:2 single-request-reopen rotate
参数
含义
你当前场景的影响
ndots:5域名中 . 少于 5 个时,优先尝试 search 域;达到 5 个则更倾向直接查询
Kubernetes DNS 常见配置
timeout:1DNS 单次查询等待约 1 秒后超时
DNS 故障时失败得比较快
attempts:2DNS 查询失败后的重试次数
最多进行多次尝试
single-request-reopenA/AAAA 查询遇到部分 DNS/NAT 兼容问题时重新打开 socket
一般可以保留,对 Kubernetes 没太大影响
rotate多个 nameserver 之间轮换选择
你当前场景比较重要 ,可能导致一次走 CoreDNS,一次走 192.168.3.1(这个不要配置,去掉即可)
1 2 3 4 5 6 7 8 9 10 11 12 13 14 15 16 17 18 19 20 21 22 23 24 25 cp /etc/resolv.conf /etc/resolv.conf.bak[root@k8snode4 yaml]# cat > /etc/resolv.conf <<'EOF' nameserver 10.96.0.2 nameserver 192.168.3.1 search zhipeng-space.svc.cluster.local svc.cluster.local cluster.local options ndots:5 timeout :1 attempts:2 single-request-reopen EOF [root@k8snode4 yaml]# cat /etc/resolv.conf nameserver 10.96.0.2 nameserver 192.168.3.1 search zhipeng-space.svc.cluster.local svc.cluster.local cluster.local options ndots:5 timeout :1 attempts:2 single-request-reopen [root@k8snode4 yaml]# curl http://springboot-test-service.zhipeng-space.svc.cluster.local/hello hello world [root@k8snode4 yaml]# curl http://springboot-test-service.zhipeng-space.svc.cluster.local {"timestamp" :"2026-11-01T14:42:52.297+00:00" ,"status" :404,"error" :"Not Found" ,"path" :"/" } [root@k8snode4 yaml]# curl http://springboot-test-service.zhipeng-space.svc.cluster.local/info {"hostName" :"springboot-test-8d957c564-7mmrn" ,"osVersion" :"5.14.0-611.5.1.el9_7.aarch64" ,"canonicalHostName" :"springboot-test-8d957c564-7mmrn" ,"javaVersion" :"17.0.19" ,"osName" :"Linux" }
把节点 /etc/resolv.conf 指向 Kubernetes CoreDNS 后,节点本身也可以直接使用 *.svc.cluster.local。 这是可以工作的,因为你已经确认 10.96.0.2 在节点上可达。只是生产环境中通常更推荐让 Pod 使用 CoreDNS,而节点自己的 DNS 仍保留原来的企业/局域网 DNS;两者职责可以分开。
节点的走向
1
2
3
4
5
6
7
8
9
10
11
12
13
14
15
节点 │ │ DNS ▼ 10.96.0.2 │ ▼ CoreDNS │ ├── *.cluster.local → Kubernetes Service │ └── 其他域名 → 上游 DNS │ ▼ 192.168.3.1
测试一下默认dns
1
2
3
4
5
6
7
8
9
10
11
12
13
14
15
16
17
root@k8snode4 yaml]# nslookup www.baidu.com ;; Got recursion not available from 10.96.0.2, trying next server ;; Got recursion not available from 10.96.0.2, trying next server ;; Got recursion not available from 10.96.0.2, trying next server Server: 10.96.0.2 Address: 10.96.0.2#53 Non-authoritative answer: www.baidu.com canonical name = www.a.shifen.com. Name: www.a.shifen.com Address: 220.181.111.1 Name: www.a.shifen.com Address: 220.181.111.232 Name: www.a.shifen.com Address: 240e:83:205:1cd:0:ff:b0b8:dee9 Name: www.a.shifen.com Address: 240e:83:205:381:0:ff:b00f:96a2
不过有一个潜在风险:CoreDNS 的 upstream 如果也是读取节点 /etc/resolv.conf,而你又把节点 /etc/resolv.conf 第一项改成 10.96.0.2,可能形成 DNS 转发环路:
1
2
3
4
5
6
7
8
CoreDNS ↓ /etc/resolv.conf ↓ 10.96.0.2 ↓ CoreDNS ↓
建议我们检查一下出否出现环路:
1
2
3
4
kubectl -n kube-system get configmap coredns -o yaml 特别看 CoreDNS 的: forward . /etc/resolv.conf
在集群节点或者内部 POD上访问我们的服务(CoreDNS 解析你自己的域名(如 springboot.test.com )方式)
上一章节,我们讲了如何用 CoreDNS 解析 Kubernetes 的 Service 域名,这一章节我们讲解如何用 CoreDNS 解析你自己的域名。例如,我们将我们的访问的域名定为springboot.test.comCoreDNS 默认只认 cluster.local,其他域名走 forward。要让它兼管自定义域名,改 kube-system/coredns 这个 ConfigMap。
第一步,首先要恢复一下 /etc/resolve.conf的配置,指向正常的 DNS服务(我们这里用的是 VM 集群,192.168.3.1是我们内部的 dns)
1
2
3
[root@k8snode4 yaml]# cat > /etc/resolv.conf <<'EOF' nameserver 192.168.3.1 EOF
⚠️ Corefile 语法写错会导致 CoreDNS CrashLoopBackOff、全集群 DNS 瘫痪。改前先备份:kubectl -n kube-system get cm coredns -o yaml > coredns.cm.bak.yaml
1 kubectl -n kube-system edit configmap coredns
在现有 .:53 { … } 块之外新增一个 server block:
1
2
3
4
5
6
7
8
9
springboot.test.com:53 { errors hosts { 192.168.3.124 springboot.test.com fallthrough } cache 30 forward . 192.168.3.1 114.114.114.114 }
详细的配置文件如下:
1 2 3 4 5 6 7 8 9 10 11 12 13 14 15 16 17 18 19 20 21 22 23 24 25 26 27 28 29 30 31 32 33 34 35 36 37 38 apiVersion: v1 data: Corefile: | .:53 { errors health { lameduck 5s } ready kubernetes cluster.local in-addr.arpa ip6.arpa { pods insecure fallthrough in-addr.arpa ip6.arpa ttl 30 } prometheus :9153 forward . 192.168.3.1 114.114.114.114 { max_concurrent 1000 } cache 30 loop reload loadbalance } springboot.test.com:53 { errors hosts { 192.168.3.124 springboot.test.com fallthrough } cache 30 forward . 192.168.3.1 114.114.114.114 } ......
生效(ConfigMap 挂载是软更新,CoreDNS 自动 reload,通常 1 分钟内;不放心就重启):
1
2
3
4
5
6
7
8
9
10
11
12
13
14
15
16
17
18
19
20
21
22
23
24
25
26
27
kubectl -n kube-system rollout restart deployment/coredns kubectl -n kube-system logs -l k8s-app=kube-dns --tail =20 [root@k8snode1 yamls]# kubectl -n kube-system rollout restart deployment/coredns deployment.apps/coredns restarted [root@k8snode1 yamls]# kubectl -n kube-system logs -l k8s-app=kube-dns --tail =20 maxprocs: Leaving GOMAXPROCS=2: CPU quota undefined .:53 springboot.test.com.:53 [INFO] plugin/reload: Running configuration SHA512 = 159dc82c61f5901f74b361795aa769ac1bb9e423559a7a3431eeaf9bc3ea44f536c72413619f3d034fc2036dabe222ecc4820af5d29239eda8e7a6c57b51d696 CoreDNS-1.12.0 linux/arm64, go1.23.3, 51e11f1 maxprocs: Leaving GOMAXPROCS=2: CPU quota undefined .:53 springboot.test.com.:53 [INFO] plugin/reload: Running configuration SHA512 = 159dc82c61f5901f74b361795aa769ac1bb9e423559a7a3431eeaf9bc3ea44f536c72413619f3d034fc2036dabe222ecc4820af5d29239eda8e7a6c57b51d696 CoreDNS-1.12.0 linux/arm64, go1.23.3, 51e11f1 maxprocs: Leaving GOMAXPROCS=2: CPU quota undefined .:53 springboot.test.com.:53 [INFO] plugin/reload: Running configuration SHA512 = 159dc82c61f5901f74b361795aa769ac1bb9e423559a7a3431eeaf9bc3ea44f536c72413619f3d034fc2036dabe222ecc4820af5d29239eda8e7a6c57b51d696 CoreDNS-1.12.0 linux/arm64, go1.23.3, 51e11f1
接下来我们需要等几分钟,让所有的 coreDNS 全部重启完毕。然后验证
1 2 3 4 5 6 7 8 9 10 11 12 13 14 15 16 17 18 19 20 21 22 23 24 25 26 27 28 29 30 31 [root@k8snode4 yaml]# kubectl exec -it springboot-test-8d957c564-7mmrn -- /bin/bash springboot-test-8d957c564-7mmrn:/app# nslookup springboot.test.com Server: 10.96.0.2 Address: 10.96.0.2:53 Name: springboot.test.com Address: 192.168.3.124 springboot-test-8d957c564-7mmrn:/app# [root@k8snode4 yaml]# curl http://springboot.test.com:30088/ curl: (6) Could not resolve host: springboot.test.com [root@k8snode4 yaml]# curl http://springboot.test.com/info curl: (7) Failed to connect to springboot.test.com port 80: Connection refused [root@k8snode4 yaml]# cat > /etc/resolv.conf <<'EOF' nameserver 10.96.0.2 nameserver 192.168.3.1 search zhipeng-space.svc.cluster.local svc.cluster.local cluster.local options ndots:5 timeout :1 attempts:2 single-request-reopen EOF [root@k8snode4 yaml]# curl http://springboot.test.com:30088/info {"hostName" :"springboot-test-8d957c564-7mmrn" ,"osVersion" :"5.14.0-611.5.1.el9_7.aarch64" ,"canonicalHostName" :"springboot-test-8d957c564-7mmrn" ,"javaVersion" :"17.0.19" ,"osName" :"Linux" }[root@k8snode4 yaml]#
我们可以看到,虽然我们在集群内部访问的时候,可以正常访问,但是我们从集群外部访问的时候,依旧不行。以为我们的 DNS 在集群外的节点根本访问不到。且我们的 host 只能使用 30088 的端口,无法真正的使用 80 端口。因此这个方案并不是最优的
使用CoreDNS rewrite 插件
rewrite 插件可以把客户端查询名改写(只改"问题"里的名字,不改响应),然后再交给后面的插件(kubernetes / hosts / forward)作答。
1
2
3
4
5
6
7
客户端查询 springboot.test.com │ ▼ rewrite 插件:把查询名改写(只改"问题" 里的名字,不改响应) │ springboot.test.com. → springboot-test-service.zhipeng-space.svc.cluster.local. ▼ 后面的插件(kubernetes / hosts / forward)按改写后的名字作答
1
2
3
4
5
6
7
8
9
10
11
12
13
14
15
16
17
18
[root@k8snode1 yaml]# kubectl -n kube-system edit configmap coredns springboot.test.com:53 { errors rewrite name springboot.test.com. springboot-test-service.zhipeng-space.svc.cluster.local. kubernetes cluster.local in-addr.arpa ip6.arpa { pods insecure fallthrough in-addr.arpa ip6.arpa ttl 30 } cache 30 forward . 192.168.3.1 114.114.114.114 } [root@k8snode1 yaml]# kubectl -n kube-system rollout restart deployment/coredns
测试
1
2
3
4
5
6
7
8
9
10
11
12
[root@k8snode1 yamls]# cat /etc/resolv.conf nameserver 10.96.0.2 [root@k8snode1 yamls]# nslookup springboot.test.com Server: 10.96.0.2 Address: 10.96.0.2#53 Name: springboot.test.com Address: 10.96.18.208 [root@k8snode1 yamls]# curl http://springboot.test.com/hello hello world [root@k8snode1 yamls]#
其他的配置方案(示例)
示例 1:regex 捕获分组,按前缀映射到不同 Service
1
2
3
4
5
6
7
8
springboot.test.com:53 { errors rewrite name regex (.*)\.springboot\.test \.com\. svc-{1}.zhipeng.svc.cluster.local. kubernetes cluster.local in-addr.arpa ip6.arpa cache 30 }
示例 2:regex 捕获分组,按前缀映射到不同 Service
1
2
3
4
5
6
7
8
9
10
11
12
springboot.test.com:53 { errors rewrite name regex (.*)\.springboot\.test \.com\. springboot.test.com. hosts { 192.168.3.130 springboot.test.com 192.168.3.130 www.springboot.test.com fallthrough } cache 30 forward . 192.168.3.1 114.114.114.114 }
总结
虽然我们介绍了很多配置 dns 的方案,但是总归是k8s集群内,而且我们还需要配置 core DNS 的地址,这样我们的域名系统才可以生效,那么如果是 k8s系统之外的机器,我们该如何配置呢?
向外部暴露服务
截止到目前为位置,我们所有的服务都基于 k8s 内部,也就是说所有的服务都是在集群内部访问的,但是我们需要将我们的服务暴露给外部,以便我们集群外部访问我们的服务,其实原理是将外部的流量引入到 k8s集群的内部,使得 k8s集群可以路由这些请求,上个大章节的 springboot-test-service 就是这样将外部的请求导入的,使用的是 nodePort 类型的 service,比如说我们在外部的机器上执行请求
1
2
➜ ~ curl http://192.168.3.124:30088/hello hello world%
原理就是将流量导入到 pod 的存在的机器上, service 类型为nodePort,将实体 node 的30088 端口上监听的服务就可以处理这个请求了,并转发给对应的 service。这种方式有弊端,就是必须知道 pod 所在的机器,而 pod 所在的机器会随着k8s资源的调度进行变化。外部的机器如何通过一个媒介来访问到 k8s集群内部的服务呢?这就用到了 Ingress
什么是Ingress
Ingress 是 Kubernetes 中的一个资源对象,它用于将集群外部流量路由到集群内部的服务。关于 Ingress 的详细介绍可以参考:https://kubernetes.io/zh/docs/concepts/services-networking/ingress/
架构如下:
1
2
3
4
5
6
7
8
9
10
11
12
13
14
15
16
17
18
19
客户端 http(s)://springboot.test.com │ DNS → 192.168.3.130(Nginx 所在机器,集群外) ▼ ┌───────────────────────────────────────────────────────────┐ │ 外部 Nginx(七层,集群外) │ │ server_name springboot.test.com │ │ upstream → 各节点:80/443 │ └───────┬───────────────┬───────────────┬───────────────────┘ ▼ ▼ ▼ 192.168.3.121 192.168.3.122 192.168.3.123 ← hostPort 80/443 ┌──────────────────────────────────────────────────┐ │ HAProxy Ingress Controller(DaemonSet,每节点一个) │ │ 按 Host + Path 路由、TLS 终止、健康检查、负载均衡 │ └───────┬──────────────────────────────────────────┘ ▼ Service springboot-test-service (zhipeng-space) ▼ Pod:8081
安装 ingress-haproxy
Install controller
以下是我整理出来的 haproxy 整理出来的yaml 文件,本章节会对这个 yaml 文件做详细的介绍,s
haproxy 结构如下
1
2
3
4
5
6
7
8
9
Namespace ingress-controller ├── ServiceAccount haproxy-ingress ← Pod 的身份 ├── ClusterRole haproxy-ingress ← 这个身份能干什么(集群级) ├── ClusterRoleBinding ← 把"身份" 和"权限" 绑起来 ├── ConfigMap haproxy-ingress ← Global 作用域的配置键(--configmap 指向它) ├── IngressClass haproxy ← 声明"这个类由谁实现" └── DaemonSet haproxy-ingress ← 真正跑的进程,每节点一份 args 里的 --configmap / --ingress-class / --controller-class 必须和上面三个资源的名字**逐字对齐**
1
2
3
4
5
6
7
8
9
10
11
12
13
14
15
16
17
18
19
20
21
22
23
24
25
26
27
28
29
30
31
32
33
34
35
36
37
38
39
40
41
42
43
44
45
46
47
48
49
50
51
52
53
54
55
56
57
58
59
60
61
62
63
64
65
66
67
68
69
70
71
72
73
74
75
76
77
78
79
80
81
82
83
84
85
86
87
88
89
90
91
92
93
94
95
96
97
98
99
100
101
102
103
104
105
106
107
108
109
110
111
112
113
114
115
116
117
118
119
120
121
122
123
124
125
126
127
128
129
130
131
132
133
134
135
136
137
138
139
140
141
142
143
144
145
146
147
148
149
150
151
152
153
154
155
156
157
158
159
160
161
162
163
164
165
166
167
168
169
170
171
172
173
174
175
176
177
178
179
--- apiVersion: v1 kind: Namespace metadata: name: ingress-controller --- apiVersion: v1 kind: ServiceAccount metadata: name: haproxy-ingress namespace: ingress-controller --- apiVersion: rbac.authorization.k8s.io/v1 kind: ClusterRole metadata: name: haproxy-ingress rules: - apiGroups: ["" ] resources: ["services" , "endpoints" , "secrets" , "configmaps" , "pods" , "namespaces" , "nodes" ] verbs: ["get" , "list" , "watch" ] - apiGroups: ["" ] resources: ["events" ] verbs: ["create" , "patch" ] - apiGroups: ["discovery.k8s.io" ] resources: ["endpointslices" ] verbs: ["get" , "list" , "watch" ] - apiGroups: ["networking.k8s.io" ] resources: ["ingresses" , "ingressclasses" ] verbs: ["get" , "list" , "watch" ] - apiGroups: ["networking.k8s.io" ] resources: ["ingresses/status" ] verbs: ["update" , "patch" ] - apiGroups: ["coordination.k8s.io" ] resources: ["leases" ] verbs: ["get" , "create" , "update" ] - apiGroups: ["gateway.networking.k8s.io" ] resources: ["gatewayclasses" , "gateways" , "httproutes" , "tcproutes" , "tlsroutes" , "udproutes" ] verbs: ["get" , "list" , "watch" ] - apiGroups: ["gateway.networking.k8s.io" ] resources: ["gatewayclasses/status" , "gateways/status" , "httproutes/status" , "tcproutes/status" , "tlsroutes/status" , "udproutes/status" ] verbs: ["update" , "patch" ] --- apiVersion: rbac.authorization.k8s.io/v1 kind: ClusterRoleBinding metadata: name: haproxy-ingress roleRef: apiGroup: rbac.authorization.k8s.io kind: ClusterRole name: haproxy-ingress subjects: - kind: ServiceAccount name: haproxy-ingress namespace: ingress-controller --- apiVersion: v1 kind: ConfigMap metadata: name: haproxy-ingress namespace: ingress-controller data: forwardfor: "add" use-forwarded-proto: "true" max-connections: "10000" timeout-client: "60s" timeout-server: "60s" ssl-redirect: "false" --- apiVersion: networking.k8s.io/v1 kind: IngressClass metadata: name: haproxy spec: controller: haproxy-ingress.github.io/controller --- apiVersion: apps/v1 kind: DaemonSet metadata: name: haproxy-ingress namespace: ingress-controller labels: app.kubernetes.io/name: haproxy-ingress spec: selector: matchLabels: app.kubernetes.io/name: haproxy-ingress updateStrategy: type: RollingUpdate rollingUpdate: maxUnavailable: 1 template: metadata: labels: app.kubernetes.io/name: haproxy-ingress spec: serviceAccountName: haproxy-ingress terminationGracePeriodSeconds: 60 nodeSelector: node-role.kubernetes.io/control-plane: "" tolerations: - key: node-role.kubernetes.io/control-plane operator: Exists effect: NoSchedule - key: node-role.kubernetes.io/master operator: Exists effect: NoSchedule containers: - name: haproxy-ingress image: quay.io/jcmoraisjr/haproxy-ingress:v0.16.1 imagePullPolicy: IfNotPresent args: - --configmap=ingress-controller/haproxy-ingress - --ingress-class=haproxy - --election-id=class-haproxy.haproxy-ingress.github.io - --update-status=true - --report-node-internal-ip-address=true - --watch-gateway=false - --reload-strategy=reusesocket - --v=2 env: - name: POD_NAMESPACE valueFrom: fieldRef: fieldPath: metadata.namespace - name: POD_NAME valueFrom: fieldRef: fieldPath: metadata.name - name: POD_IP valueFrom: fieldRef: fieldPath: status.podIP ports: - name: http containerPort: 80 hostPort: 80 protocol: TCP - name: https containerPort: 443 hostPort: 443 protocol: TCP - name: healthz containerPort: 10254 protocol: TCP readinessProbe: httpGet: path: /readyz port: 10254 initialDelaySeconds: 5 periodSeconds: 5 livenessProbe: httpGet: path: /healthz port: 10254 initialDelaySeconds: 10 periodSeconds: 10 resources: requests: cpu: 100m memory: 128Mi limits: cpu: "1" memory: 512Mi securityContext: allowPrivilegeEscalation: false capabilities: drop: ["ALL" ] add: ["NET_BIND_SERVICE" ]
这里有几个修改我们需要注意
只调度到 master 节点
1
2
3
4
5
spec: ... nodeSelector: node-role.kubernetes.io/control-plane: "" ...
ConfigMap 的配置项以及含义
键
含义
为什么这么配
forwardfor: “add”
HAProxy 给上游追加 X-Forwarded-For
你的链路是 客户端 → Nginx → HAProxy → Pod。必须 append 才能让后端看到完整链路(客户端 IP 在 XFF 的第一个位置)。取值 add(追加)/update(覆盖)/ifmissing(没有才加)
use-forwarded-proto: “true”
信任上游传来的 X-Forwarded-Proto
你在 Nginx 上终止了 TLS,到 HAProxy 已经是明文 HTTP。不信任这个头,Spring Boot 生成的跳转链接会变成 http://,前端混合内容报警
max-connections: “10000”
全部 proxy 的总并发上限(Global)
默认 2000 对小集群够用;调到 1w 是给内部服务调用留余量。这是防御性上限,超了返回 503 而不是把节点打爆
timeout-client: “60s”
客户端侧超时(Global)
默认 50s。L7 场景下 60s 是比较通用的值;比上游 Nginx 的 proxy_read_timeout 略短会更早释放连接
timeout-server: “60s”
后端侧超时(Backend)
Spring Boot 冷启动/慢接口常见,60s 避免 504;如果某个接口特别慢,可以在那个 Ingress 上用注解单独调大,不要全局放大
ssl-redirect: “false”
是否强制 80→443 跳转(Path)
关键:TLS 已经在外部 Nginx 终止,HAProxy 收到的是 HTTP。若这里为 true,HAProxy 会再回 302 到 https,而 Nginx 又转回来 → 无限跳转。所以必须关
启动参数
键
含义
为什么这么配
–configmap=ingress-controller/haproxy-ingress
指定全局 ConfigMap(格式 ns/name)
v0.13+ 若这个 ConfigMap 不存在会直接 panic 退出,所以 ConfigMap 必须和它一起创建;注意"ns/name"两段都要对
–ingress-class=haproxy
只接管 kubernetes.io/ingress.class: haproxy
和 ingress-nginx 共存时互不干扰
–controller-class=haproxy-ingress.github.io/controller
只接管 spec.controller 等于这个值的 IngressClass
和 IngressClass 资源逐字对齐;同时它是区分"同集群多套 HAProxy Ingress"的手段
–election-id=class-haproxy.haproxy-ingress.github.io
leader 选举的锁名
v0.15+ 的默认格式是 class-%s.haproxy-ingress.github.io (%s 填 class 名)。写全是为了显式,也避免有人改了 class 名却忘了改这个导致两套控制器抢同一把锁
–update-status=true
把节点 IP 回填到 Ingress 的 status.loadBalancer.ingress
默认就是 true,写出来是为了说明"它依赖 leases 权限 + leader 选举",别把 RBAC 那几条删了
–report-node-internal-ip-address=true
status 里用节点内网 IP
你的节点只有 InternalIP,没有 ExternalIP,不加这个 kubectl get ingress 的 ADDRESS 列会一直是空的(很多人以为控制器没工作)
–watch-gateway=false
不监听 Gateway API CRD
你没装 Gateway API CRD,v0.14+ 默认开启会不停报"找不到 CRD"的错日志,掩盖真正的错误。关掉后 RBAC 里 gateway 那两段也可以删
–reload-strategy=reusesocket
重载时把监听 socket 交给新进程(无损)
v0.8 起就是默认值。写出来是因为它直接影响"改配置会不会断连接",值得显式留痕
–v=2 日志级别
(1=info,2=+debug)
排障期用 2,稳定后可降到 1 减少日志量
端口与探针
1
2
3
4
5
6
ports: - containerPort: 80 / hostPort: 80 - containerPort: 443 / hostPort: 443 - containerPort: 10254 readinessProbe: /readyz : 10254 livenessProbe: /healthz : 10254
–update-status=true,控制器需要知道自己在哪个 namespace(用来给自己打选主/状态相关的东西),必须通过 Downward API 注入 POD_NAMESPACE。我上一版清单漏了这段 env。
1
2
3
4
5
6
7
8
9
10
11
12
13
env : - name: POD_NAMESPACE valueFrom: fieldRef: fieldPath: metadata.namespace - name: POD_NAME valueFrom: fieldRef: fieldPath: metadata.name - name: POD_IP valueFrom: fieldRef: fieldPath: status.podIP
apply controller
1
2
3
4
5
6
7
kubectl apply -f haproxy-ingress-install.yaml [root@k8snode1 containerd.service.d]# kubectl -n ingress-controller get pods -o wide NAME READY STATUS RESTARTS AGE IP NODE NOMINATED NODE READINESS GATES haproxy-ingress-94jjm 1/1 Running 0 10m 10.244.98.205 k8snode3 <none> <none> haproxy-ingress-nkgsm 1/1 Running 0 10m 10.244.185.201 k8snode2 <none> <none> haproxy-ingress-vfsrm 1/1 Running 0 7m42s 10.244.249.12 k8snode1 <none> <none> [root@k8snode1 containerd.service.d]#
check
1
2
3
4
5
6
7
8
SA=system:serviceaccount:ingress-controller:haproxy-ingress kubectl auth can-i list endpointslices --as=$SA -A kubectl auth can-i watch ingresses.networking.k8s.io --as=$SA -A kubectl auth can-i update ingresses/status --as=$SA -A kubectl auth can-i get secrets --as=$SA -A kubectl auth can-i update leases.coordination.k8s.io --as=$SA -n ingress-controller
check 进程以及Pod 内的端口
1
2
3
4
5
6
7
8
9
10
11
12
13
14
15
16
17
18
19
20
[root@k8snode1 containerd.service.d]# kubectl -n ingress-controller exec haproxy-ingress-nkgsm -- sh -c 'netstat -ltnp' Active Internet connections (only servers) Proto Recv-Q Send-Q Local Address Foreign Address State PID/Program name tcp 0 0 0.0.0.0:10253 0.0.0.0:* LISTEN 21/haproxy tcp 0 0 0.0.0.0:80 0.0.0.0:* LISTEN 21/haproxy tcp 0 0 0.0.0.0:443 0.0.0.0:* LISTEN 21/haproxy tcp 0 0 0.0.0.0:1936 0.0.0.0:* LISTEN 21/haproxy tcp 0 0 :::10254 :::* LISTEN 6/haproxy-ingress-c [root@k8snode1 containerd.service.d]# kubectl -n ingress-controller exec haproxy-ingress-nkgsm -- sh -c 'ps aux 2>/dev/null || ps -ef' PID USER TIME COMMAND 1 haproxy 0:00 /usr/bin/dumb-init -- /start.sh --configmap=ingress-controller/haproxy-ingress --ingress-class=haproxy --election-id=class-haproxy.haproxy-ingress.github.io --update-status=true --report-node-internal-ip-address=true --watch-gateway=false --reload-strategy=reusesocket --v=2 6 haproxy 0:06 /haproxy-ingress-controller --configmap=ingress-controller/haproxy-ingress --ingress-class=haproxy --election-id=class-haproxy.haproxy-ingress.github.io --update-status=true --report-node-internal-ip-address=true --watch-gateway=false --reload-strategy=reusesocket --v=2 19 haproxy 0:00 haproxy -W -S /var/run/haproxy/master.sock,mode,600 -f /etc/haproxy 21 haproxy 0:01 haproxy -W -S /var/run/haproxy/master.sock,mode,600 -f /etc/haproxy 56 haproxy 0:00 sh -c ps aux 2>/dev/null || ps -ef 62 haproxy 0:00 ps aux [root@k8snode1 containerd.service.d]# kubectl -n ingress-controller exec haproxy-ingress-nkgsm -- \ sh -c 'wget -qO- http://127.0.0.1:10254/healthz; echo; wget -qO- http://127.0.0.1:10254/readyz' ok ok[root@k8snode1 containerd.service.d]#
上述的测试完成之后,证明haproxy-ingress 已经正常运行,接下来我们需要配置 ingress 来使用 haproxy-ingress 来实现负载均衡
改造 springboot-test.yaml, 使得其中有两个实例,并且以 ClisterIP 的方式存在
1
2
3
4
5
6
7
8
9
10
11
12
13
14
15
16
17
18
19
20
21
22
23
24
25
26
27
28
29
30
31
32
33
34
35
36
37
38
39
40
41
42
43
44
45
46
47
48
49
50
apiVersion: apps/v1 kind: Deployment metadata: name: springboot-test namespace: zhipeng-space spec: replicas: 2 selector: matchLabels: app: springboot-test template: metadata: labels: app: springboot-test spec: nodeSelector: node-role.kubernetes.io/worker: "" containers: - name: springboot-app image: lizhipeng/springboot-test ports: - name: http containerPort: 8081 protocol: TCP readinessProbe: tcpSocket: port: 8081 initialDelaySeconds: 10 periodSeconds: 5 livenessProbe: tcpSocket: port: 8081 initialDelaySeconds: 30 periodSeconds: 10 --- apiVersion: v1 kind: Service metadata: name: springboot-test-service namespace: zhipeng-space spec: type : ClusterIP selector: app: springboot-test ports: - name: http port: 80 targetPort: 8081 protocol: TCP
1 2 3 4 5 6 7 8 9 root@k8snode4 yaml]# kubectl apply -f springboot-test-clusterIp.yaml deployment.apps/springboot-test configured service/springboot-test-service configured root@k8snode4 yaml]# curl http://springboot.test.com/info {"hostName" :"springboot-test-84d89bdf9c-vrfx4" ,"osVersion" :"5.14.0-611.5.1.el9_7.aarch64" ,"canonicalHostName" :"springboot-test-84d89bdf9c-vrfx4" ,"javaVersion" :"17.0.19" ,"osName" :"Linux" }[root@k8snode4 yaml]# curl http://springboot.test.com/infocurl http://springboot.test.com/info {"hostName" :"springboot-test-84d89bdf9c-vcq6r" ,"osVersion" :"5.14.0-611.5.1.el9_7.aarch64" ,"canonicalHostName" :"springboot-test-84d89bdf9c-vcq6r" ,"javaVersion" :"17.0.19" ,"osName" :"Linux" }[root@k8snode4 yaml]#
配置 springboot-test-ingress
下面我们配置 ingress, 我们希望 通过 springboot-test-service.zhipengk8scluster.com 来访问 springboot-test-service
1
2
3
4
5
6
7
8
9
10
11
12
13
14
15
16
17
18
19
20
21
22
apiVersion: networking.k8s.io/v1 kind: Ingress metadata: name: springboot-test namespace: zhipeng-space annotations: haproxy-ingress.github.io/balance-algorithm: leastconn haproxy-ingress.github.io/timeout-server: 60s haproxy-ingress.github.io/ssl-redirect: "false" spec: ingressClassName: haproxy rules: - host: springboot-test-service.zhipengk8scluster.com http: paths: - path: / pathType: Prefix backend: service: name: springboot-test-service port: number: 80
验证
1
2
3
4
5
6
7
8
9
10
11
12
13
14
15
16
17
18
19
20
21
22
23
24
25
26
27
28
29
30
[root@k8snode1 yamls]# kubectl -n zhipeng-space get ingress springboot-test NAME CLASS HOSTS ADDRESS PORTS AGE springboot-test haproxy springboot-test-service.zhipengk8scluster.com 192.168.3.121,192.168.3.122,192.168.3.123 80 140m [root@k8snode1 yamls]# kubectl -n ingress-controller logs ds/haproxy-ingress --tail =50 | grep -iE 'springboot|zhipengk8scluster|UPDATE|ADD' Found 3 pods, using pod/haproxy-ingress-nkgsm I1103 09:05:10.262148 6 services.go:274] "finish haproxy update" logger="services" id =10 parse-ingress-ms=0.74271 write-maps-ms=0.058141 address-status-update-ms=4.530814 total-ms=5.331665 I1103 09:18:02.602763 6 watchers.go:516] "notify" logger="watchers" event="create" kind="*v1.Ingress" namespace="zhipeng-space" name="springboot-test" I1103 09:18:02.801948 6 services.go:257] "starting haproxy update" logger="services" id =11 I1103 09:18:02.802180 6 converters.go:75] "applying 1 change notification: [add/Ingress:zhipeng-space/springboot-test]" logger="converter" I1103 09:18:02.809483 6 instance.go:465] "updating 1 host(s): [zhipengk8scluster.com]" logger="haproxy" I1103 09:18:02.809505 6 instance.go:482] "updating 1 backend(s): [zhipeng-space_springboot-test-service_8081]" logger="haproxy" I1103 09:18:02.809642 6 dynupdate.go:121] "added host 'zhipengk8scluster.com'" logger="haproxy" I1103 09:18:02.809669 6 dynupdate.go:153] "added backend 'zhipeng-space_springboot-test-service_8081'" logger="haproxy" I1103 09:18:02.809697 6 dynupdate.go:104] "need to reload due to config changes: [hosts backends]" logger="haproxy" I1103 09:18:03.046246 6 svcaddress.go:144] "address status updated" logger="services.address" kind="*v1.Ingress" namespace="zhipeng-space" name="springboot-test" I1103 09:18:03.046317 6 services.go:274] "finish haproxy update" logger="services" id =11 parse-ingress-ms=3.757201 write-maps-ms=3.712209 write-config-ms=5.46327 reload-haproxy-ms=209.49973 address-status-update-ms=21.863289 total-ms=244.29568 I1103 11:35:52.297202 6 watchers.go:516] "notify" logger="watchers" event="update" kind="*v1.Ingress" namespace="zhipeng-space" name="springboot-test" I1103 11:35:52.500322 6 services.go:257] "starting haproxy update" logger="services" id =12 I1103 11:35:52.501467 6 converters.go:75] "applying 1 change notification: [update/Ingress:zhipeng-space/springboot-test]" logger="converter" I1103 11:35:52.509786 6 instance.go:465] "updating 2 host(s): [springboot-test-service.zhipengk8scluster.com zhipengk8scluster.com]" logger="haproxy" I1103 11:35:52.509814 6 instance.go:482] "updating 1 backend(s): [zhipeng-space_springboot-test-service_8081]" logger="haproxy" I1103 11:35:52.510654 6 dynupdate.go:121] "added host 'springboot-test-service.zhipengk8scluster.com'" logger="haproxy" I1103 11:35:52.510777 6 dynupdate.go:130] "removed host 'zhipengk8scluster.com'" logger="haproxy" I1103 11:35:52.511171 6 dynupdate.go:215] "diff outside endpoints of backend 'zhipeng-space_springboot-test-service_8081'" logger="haproxy" I1103 11:35:52.511539 6 dynupdate.go:104] "need to reload due to config changes: [hosts backends]" logger="haproxy" [WARNING] (71) : Proxy zhipeng-space_springboot-test-service_8081 stopped (cumulated conns: FE: 0, BE: 0). I1103 11:35:52.672539 6 services.go:274] "finish haproxy update" logger="services" id =12 parse-ingress-ms=5.068429 write-maps-ms=4.129918 write-config-ms=8.970261 reload-haproxy-ms=152.08105 address-status-update-ms=1.879777 total-ms=172.12944
数据面 —— 规则是否进了 haproxy.cfg
1
2
3
4
5
6
7
8
9
10
[root@k8snode1 yamls]# kubectl -n ingress-controller exec ds/haproxy-ingress -- sh -c 'grep -n -i -A8 "zhipengk8scluster\|springboot-test-service" /etc/haproxy/haproxy.cfg | head -40' 50:backend zhipeng-space_springboot-test-service_8081 51- mode http 52- balance leastconn 53- timeout server 60s 54- acl https-request ssl_fc 55- http-response set-header Strict-Transport-Security "max-age=15768000" if https-request 56- server srv001 10.244.187.2:8081 weight 1 check inter 2s 57- server srv002 10.244.192.71:8081 weight 1 check inter 2s 58- server srv003 127.0.0.1:1023 disabled weight 1 check inter 2s
测试如下:
1
2
3
4
5
6
7
8
9
10
11
12
13
14
15
[root@k8snode1 yamls]# curl -s -H 'Host: springboot-test-service.zhipengk8scluster.com' http://192.168.3.121/hello hello world [root@k8snode1 yamls]# curl -s -H 'Host: springboot-test-service.zhipengk8scluster.com' http://192.168.3.121/info {"hostName" :"springboot-test-84d89bdf9c-vcq6r" ,"osVersion" :"5.14.0-611.5.1.el9_7.aarch64" ,"canonicalHostName" :"springboot-test-84d89bdf9c-vcq6r" ,"javaVersion" :"17.0.19" ,"osName" :"Linux" } [root@k8snode1 yamls]# curl -s -H 'Host: springboot-test-service.zhipengk8scluster.com' http://192.168.3.121/info {"hostName" :"springboot-test-84d89bdf9c-vrfx4" ,"osVersion" :"5.14.0-611.5.1.el9_7.aarch64" ,"canonicalHostName" :"springboot-test-84d89bdf9c-vrfx4" ,"javaVersion" :"17.0.19" ,"osName" :"Linux" } [root@k8snode1 yamls]# curl -s -H 'Host: springboot-test-service.zhipengk8scluster.com' http://192.168.3.122/info {"hostName" :"springboot-test-84d89bdf9c-vrfx4" ,"osVersion" :"5.14.0-611.5.1.el9_7.aarch64" ,"canonicalHostName" :"springboot-test-84d89bdf9c-vrfx4" ,"javaVersion" :"17.0.19" ,"osName" :"Linux" } [root@k8snode1 yamls]# curl -s -H 'Host: springboot-test-service.zhipengk8scluster.com' http://192.168.3.123/info {"hostName" :"springboot-test-84d89bdf9c-vrfx4" ,"osVersion" :"5.14.0-611.5.1.el9_7.aarch64" ,"canonicalHostName" :"springboot-test-84d89bdf9c-vrfx4" ,"javaVersion" :"17.0.19" ,"osName" :"Linux" }
映射端口测试 haproxy
1936 端口就是 HAProxy 的 stats 页,直接映射出来看:
1
2
3
kubectl -n ingress-controller port-forward --address 0.0.0.0 \ pod/$(kubectl -n ingress-controller get pod -l app.kubernetes.io/name=haproxy-ingress \ --field-selector spec.nodeName=k8snode1 -o jsonpath='{.items[0].metadata.name}' ) 1936:1936
然后访问 http://192.168.3.121:1936 便可以得到 HAProxy 的 stats 页面。
总结
接下来我们可以绑定 DNS 然后将 使用 keepalived 将多个 nginx 绑定到同一个 vip 上,之后通过 DNS 和 vip 的绑定来对外提供服务,而 nginx 的代理则将请求路由到 192.168.3.121 192.168.3.122 192.168.3.123 这三台 haproxy就能访问我们的 springboot-test-service 了。
总结
一、常用命令速查
CoreDNS
1 2 3 4 5 6 7 8 9 10 11 nslookup springboot.test.com 10.96.0.2 getent hosts springboot.test.com kubectl -n kube-system get cm coredns -o yaml > coredns.bak.yaml kubectl -n kube-system edit configmap coredns kubectl -n kube-system rollout restart deployment/coredns kubectl -n kube-system logs -l k8s-app=kube-dns --tail =50
HAProxy Ingress 部署与校验
1 2 3 4 5 6 7 8 9 10 11 12 13 14 15 16 kubectl -n ingress-controller get ds,pods -o wide kubectl -n ingress-controller rollout status ds/haproxy-ingress SA=system:serviceaccount:ingress-controller:haproxy-ingress kubectl auth can-i update ingresses --subresource=status --as=$SA -n zhipeng-space kubectl -n ingress-controller exec ds/haproxy-ingress -- haproxy -c -f /etc/haproxy/haproxy.cfg kubectl -n ingress-controller exec ds/haproxy-ingress -- sh -c 'grep springboot /etc/haproxy/haproxy.cfg' kubectl -n ingress-controller exec <pod> -- sh -c 'netstat -ltnp' kubectl -n ingress-controller exec <pod> -- sh -c 'wget -qO- http://127.0.0.1:10254/healthz'
RBAC / 权限校验
1
2
3
4
5
6
7
8
9
SA=system:serviceaccount:ingress-controller:haproxy-ingress kubectl auth can-i update ingresses --subresource=status --as=$SA -n zhipeng-space 扩展①:子资源错误写法对照 kubectl auth can-i get pods/log --as=$SA (/log 写法在新版不灵,用 --subresource) 扩展②:列出该 SA 全部权限 kubectl auth can-i --list --as=$SA | head -3
端口/流量验证
1 2 3 4 5 6 7 8 9 10 11 12 13 14 15 16 17 18 19 20 21 curl -sv -H 'Host: springboot.test.com' http://192.168.3.121/hello for ip in 192.168.3.121 192.168.3.122 192.168.3.123; do printf '%s -> ' $ip curl -s -o /dev/null -w '%{http_code}\n' -H 'Host: springboot.test.com' http://$ip /hello done iptables -t nat -S | grep -E 'DNAT.*dport (80|443)' kubectl -n ingress-controller port-forward --address 0.0.0.0 pod/<pod> 1936:1936 扩展①:加 hostPort 永久暴露 kubectl patch ds haproxy-ingress --type =json -p='[{"op":"add","path":"/spec/template/spec/containers/0/ports/-","value":{"name":"stats","containerPort":1936,"hostPort":1936,"protocol":"TCP"}}]' 扩展②:NodePort + Local kubectl expose ds haproxy-ingress --type =NodePort --name=haproxy-stats --port=1936 --target-port=1936 && kubectl -n ingress-controller patch svc haproxy-stats -p '{"spec":{"externalTrafficPolicy":"Local","ports":[{"port":1936,"nodePort":31936,"targetPort":1936}]}}'
集群与资源状态
1 2 3 4 5 6 7 8 9 10 kubectl get nodes,svc,ep,ing,deploy,ds,pods -o wide kubectl get cs kubectl get csr -o wide kubectl get pv,pvc,pdb,sts,rs,job,cj,sa,cm,secret,svcacc,role,rolebinding,ns 扩展①:只看故障 Pod 的详细描述 kubectl -n ingress-controller describe pod <pod> | tail -20 扩展②:按节点筛选 kubectl -n ingress-controller get pods -l app.kubernetes.io/name=haproxy-ingress --field-selector spec.nodeName=k8snode2
1
2
3
4
5
等待滚动更新完成 kubectl -n ingress-controller rollout status ds/haproxy-ingress 扩展①:带超时 kubectl ... rollout status ds/haproxy-ingress --timeout =120s 扩展②:查看历史/回滚 kubectl -n ingress-controller rollout history ds/haproxy-ingress / ... rollout undo ds/haproxy-ingress
通用排障与校验
1
2
3
4
5
6
7
8
9
10
11
12
13
14
15
16
kubectl apply --dry-run=server -f haproxy-ingress-install.yaml 扩展①:看差异 kubectl diff -f haproxy-ingress-install.yaml kubectl get nodes -L node-role.kubernetes.io/worker 扩展①:打标签 kubectl label node k8snode4 node-role.kubernetes.io/worker="" 扩展②:看所有角色 kubectl get nodes --show-labels | grep -E 'control-plane|worker' kubectl -n zhipeng-space create deployment echo --image=k8s.gcr.io/echoserver:1.10 kubectl -n zhipeng-space expose deployment echo --port=8080 curl -s -H 'Host: echo.zhipengk8scluster.com' http://192.168.3.121/springboot-test/hello | head -20